File system management
File system hierarchy
- Image below shows some of the important folders in Windows.
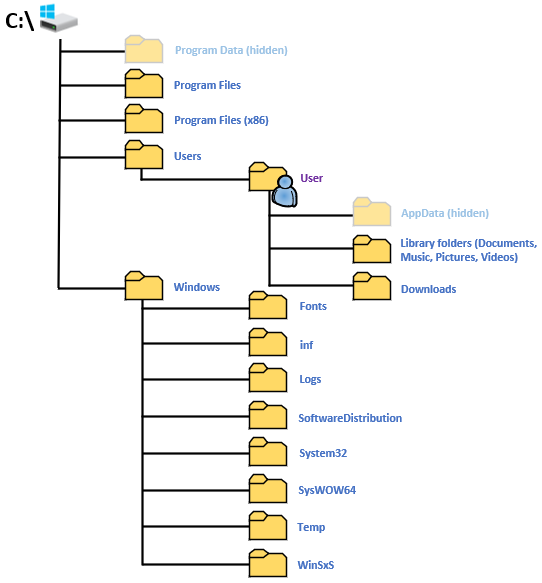
- Descriptions of the presented folders:
- C:\ (Root folder): Main folder of the primary hard drive where the operating system and other essential system files are stored
- Program Data: Hidden folder containing application data that is not user-specific. It contains settings and data that should be accessible to all users on the computer
- Program Files: Installed applications and programs (64-bit)
- Program Files (x86): Installed applications and programs (32-bit)
- Users: Contains each user account as a separate folder
- AppData: Hidden folder containing application-specific data and settings for each user
- Desktop: Files and shortcuts in user's desktop
- Downloads: The default storage location for files downloaded from the internet
- Libraries: User files organised by the type (documents, music, pictures and videos)
- Windows: Main system folder containing essential files and folders required for the operating system to function properly
- Fonts: This folder stores all the fonts installed on the system. It's essential for the proper display of text in applications and the OS itself
- inf: Contains driver installation information files. These .inf files are used by the system during the installation of drivers and hardware components
- Logs: Stores various system logs generated by the operating system and some applications
- SoftwareDistribution: Used by Windows Update to download and store update files before they are installed
- System32: This folder contains critical system files, including system libraries (DLLs), executable files, and system utilities
- SysWOW64: This folder is used on 64-bit versions of Windows to store 32-bit system files and libraries. It ensures compatibility with 32-bit applications running on a 64-bit OS
- Temp: A temporary storage folder used by Windows and various applications to store temporary files during installations and operations
- WinSxS: The Windows Side-by-Side folder stores multiple versions of system files to support applications that require different versions of the same DLL
File explorer
- File Explorer in Windows 11 is the primary tool for managing files and folders on your computer.
- It provides a user-friendly interface to navigate the file system, access system locations, and perform file operations.
- File explorer structure is presented in the example image below.

Files
-
In general, the following basic operations can be performed for files and folders in the file system:
-
Creating Files and Folders
- Using the right-click context menu
- Using the "New" option in the File Explorer ribbon
- Keyboard shortcuts (e.g., Ctrl+Shift+N for new folder)
-
Renaming Files and Folders
- Right-click context menu -> Rename
- Selecting the file/folder and pressing F2
- Using the "Rename" option in the File Explorer ribbon
-
Copying Files and Folders
- Right-click -> Copy
- Ctrl+C shortcut
- Using the "Copy" option in the File Explorer ribbon
- Drag-and-drop while holding the Ctrl key
-
Moving Files and Folders
- Right-click -> Cut
- Ctrl+X shortcut
- Using the "Move to" option in the File Explorer ribbon
- Drag-and-drop (move within the same drive)
-
Deleting Files and Folders
- Right-click -> Delete
- Selecting and pressing the Delete key
- Using the "Delete" option in the File Explorer ribbon
- Shift+Delete for permanent deletion
-
Restoring Deleted Files
- Using the Recycle Bin to restore deleted items
-
File extensions
-
File extensions are used so that system and users are able to
- identify the type of file
- determine which program should open it
-
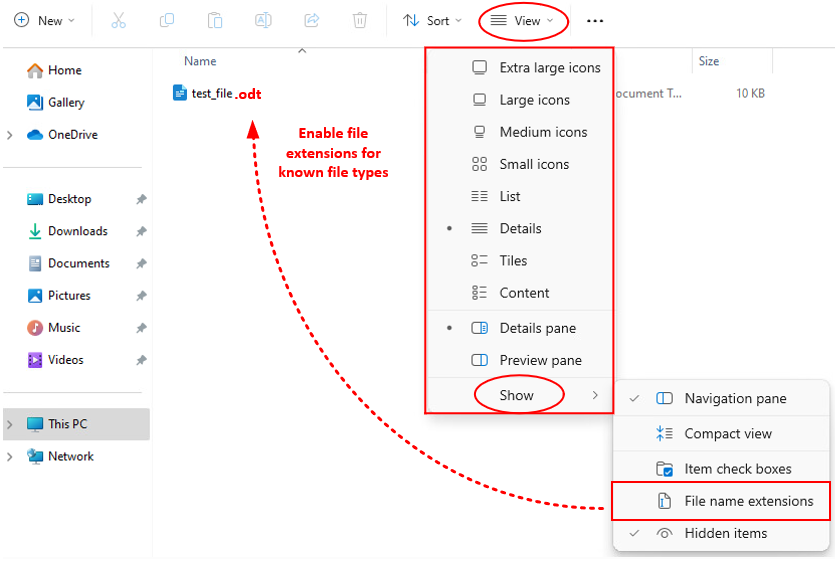
Important: By default, Windows hides file extensions for known file types!
- To view them, go to File Explorer -> View tab -> Options -> Change folder and search options -> View tab -> Uncheck Hide extensions for known file types (see example image below)
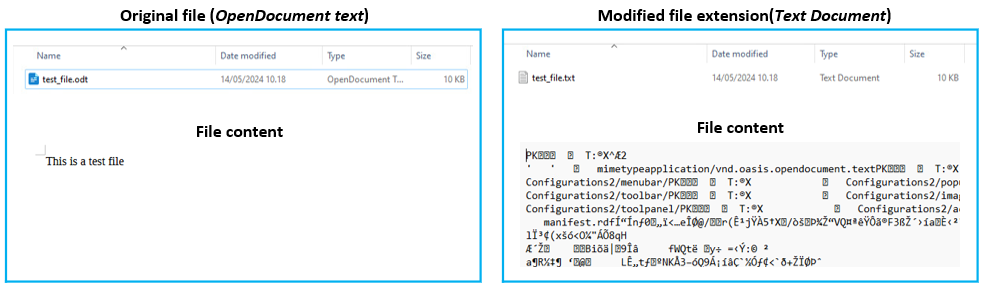
- Renaming a file to change its extension can alter how it’s used or opened
- Right-click the file -> Rename -> Change the extension
- Important: Changing file extensions incorrectly can render files unusable (see example image below)
Note: Malicious files might use double extensions (e.g., document.pdf.exe). Always ensure extensions are visible to recognize potentially harmful files!
File shortcut
- File shortcuts are a convenient way to quickly access files, folders, applications, and even websites without navigating through the entire file structure
- They work by creating a small file that points to the actual location of the target item
- File shortcut can be created to the Desktop like shown in the example image below

- If original file gets deleted or moved for some reason, you will receive an error as shown below
- To fix this, file needs to be restored to the folder where shortcut points or alternatively edit shortcut settings to match new file location

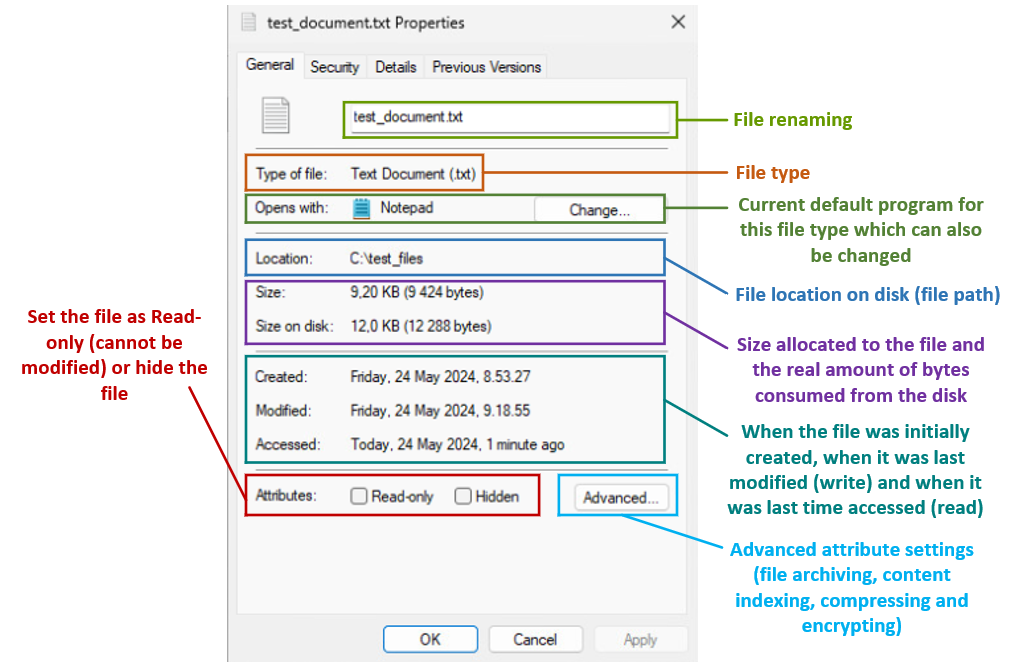
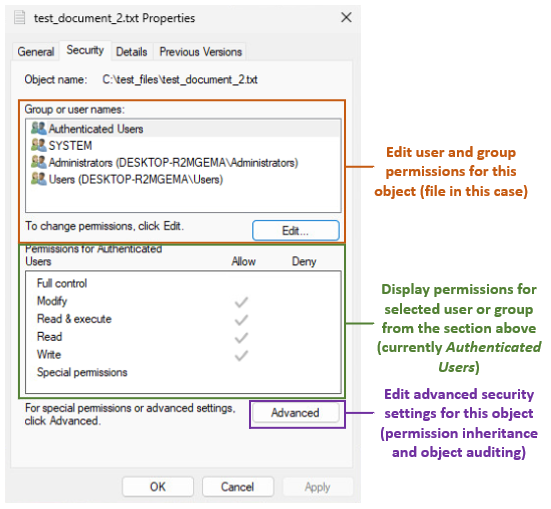
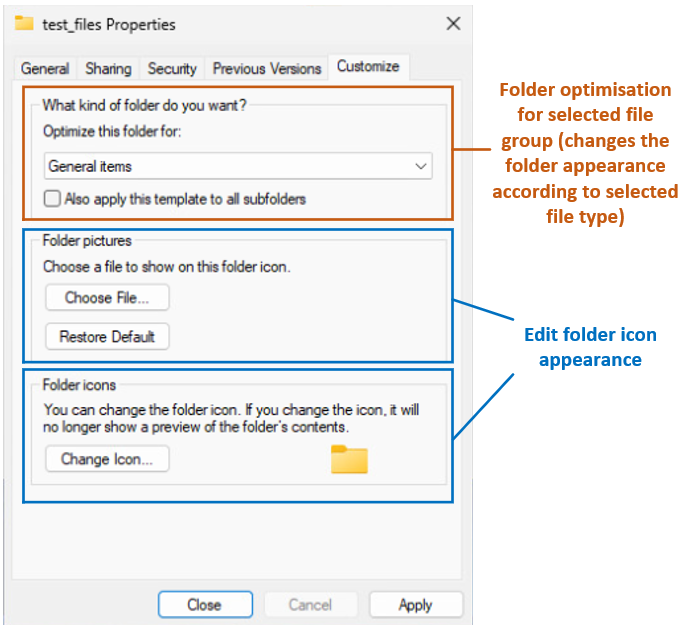
File properties and attributes
- File properties provide detailed information about files and folders, including metadata and attributes that help manage and organize them
- Understanding file properties is crucial for effective file management, troubleshooting, and maintaining system performance
- File properties can be accessed by right clicking the file and selecting Properties (also click the file and use Alt + Enter key combination)
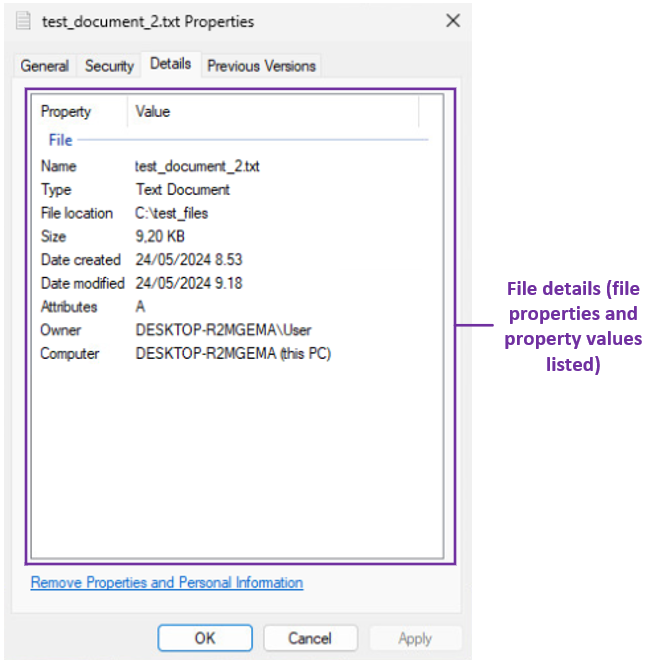
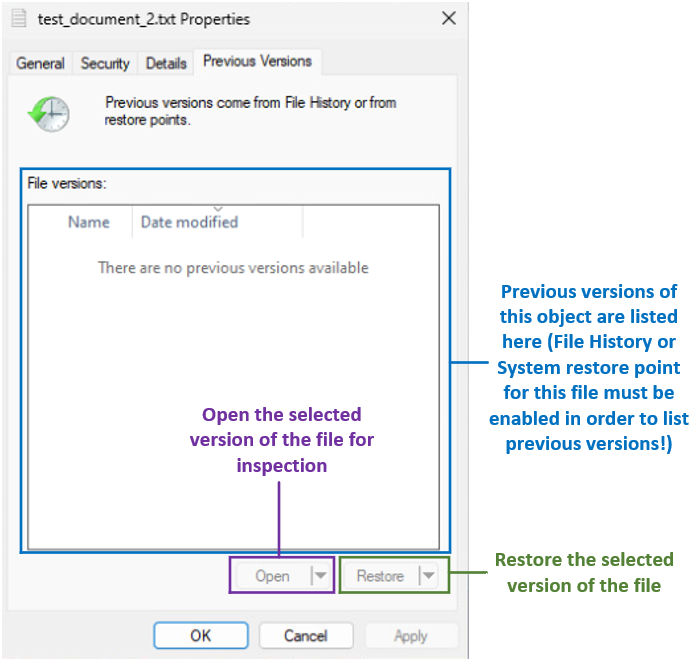
- Below are the descriptions of all four properties tabs for files
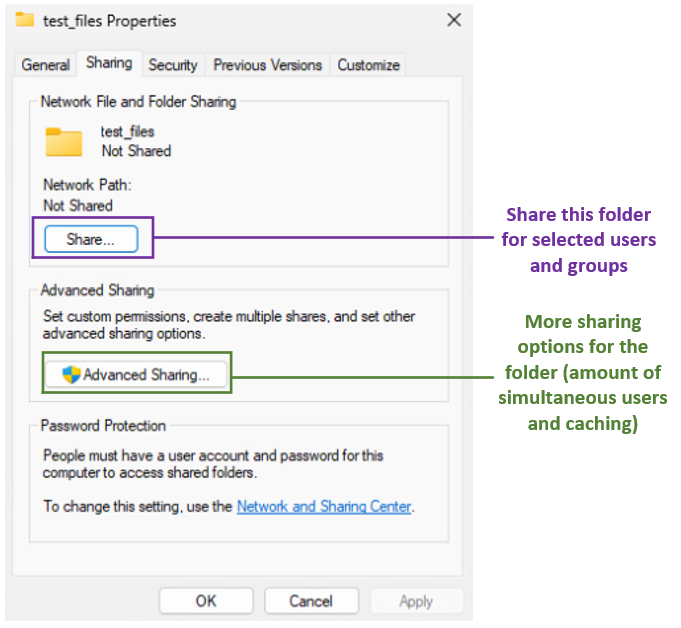
- Folders also have the General, Security and Previous Versions tabs similar to files, but in addition, there is also Sharing and Customize tabs available for each folder
- The content of these two forementioned tabs are presented below
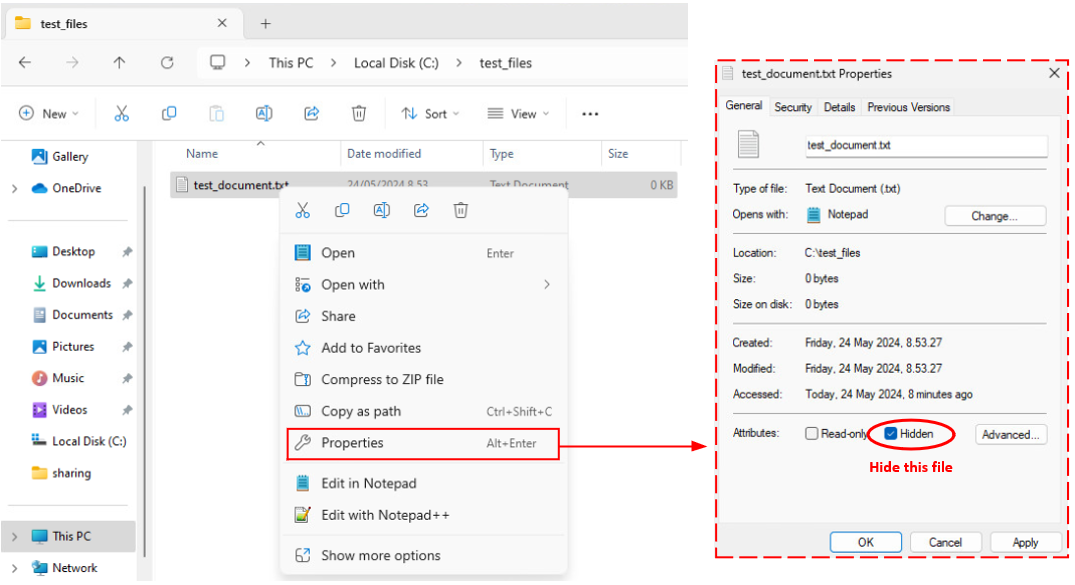
- File attributes are specific properties that define certain behaviors of the file or folder:
- Read-only: The file can be read but not modified
- Hidden: The file is hidden from the normal view in File Explorer
- Archive: Indicates the file is marked for backup or removal
- System: Used by the operating system; not intended for user modification
- Compressed: Indicates that the file is compressed to save disk space
- Encrypted: The file is encrypted for security purposes
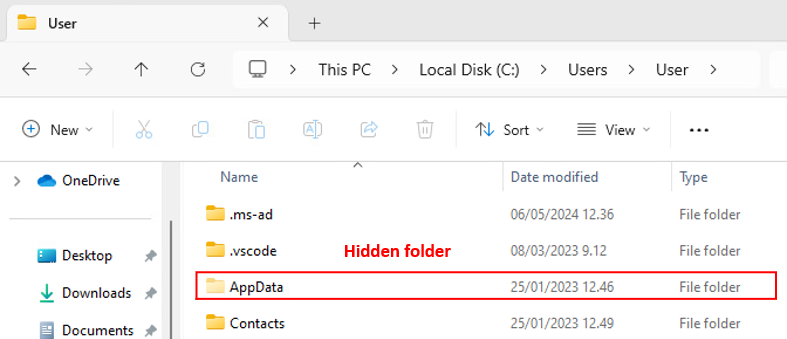
Hidden files
- Hidden files are files and folders that are not visible by default in File Explorer
- These files are typically system or configuration files that users do not usually need to interact with directly, and hiding them helps prevent accidental modification or deletion, which could potentially cause system instability or data loss
- Some common hidden files and folders:
- System Files: Files necessary for the operating system to function properly (e.g., pagefile.sys, hiberfil.sys)
- Configuration Files: Files that store settings and preferences for the operating system and applications (e.g., .ini files, desktop.ini)
- User Data: Hidden folders in user directories that store application data (e.g., AppData folder in user profiles which is shown in the example image below)
- Below is an example how files and folders can be hidden
- In order to hide target file or folder, user must have adequate permissions for the target (Modify permission, which is required for changing the attributes of the file or folder)
System restore
- Restore points in Windows 11 are a crucial part of the system's built-in recovery options
- They allow you to revert your system's state to a previous point in time, which can be helpful if you encounter system problems after installing new software, updates, or drivers
- A restore point is essentially a snapshot of your system files, settings, and registry at a specific point in time
- These snapshots do not affect personal files, but they can revert system settings and files to a previous state, potentially fixing issues caused by recent changes
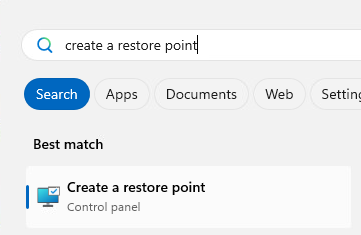
- In order to manage restore points in your system, open the restore point tool by typing create a restore point search words for Windows search field as shown in the example image below
- System restore points consume disk space from the computer and thus those aren't enabled by default
- System restore menu is presented in the example image below
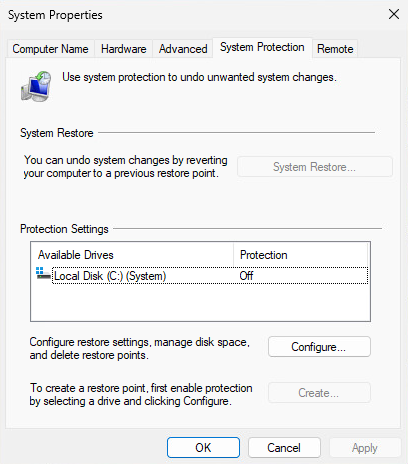
- System restore feature must be first enabled in order to create restore points and restore files and system snapshots from them
- System restore feature can be enabled by following these steps:
- From system restore tool menu choose Configure
- From the opening window choose Turn on system protection
- Adjust the maximum disk space dedicated for the system restore if needed
- Click Apply and OK

- System restore will give warning if no restore points have been created
- For creating a new restore point for your system, follow these steps:
- From system restore tool menu choose Create
- Give your new restore point a name
- Click Create
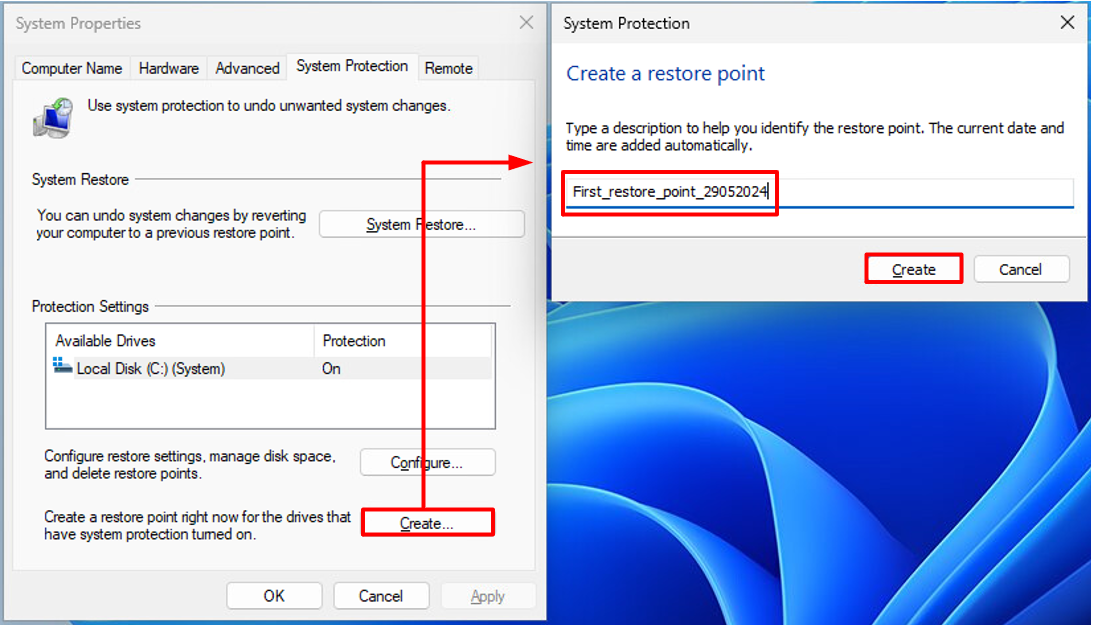
Note: System restore point creation may take some time depending on the consumed disk space on the system!
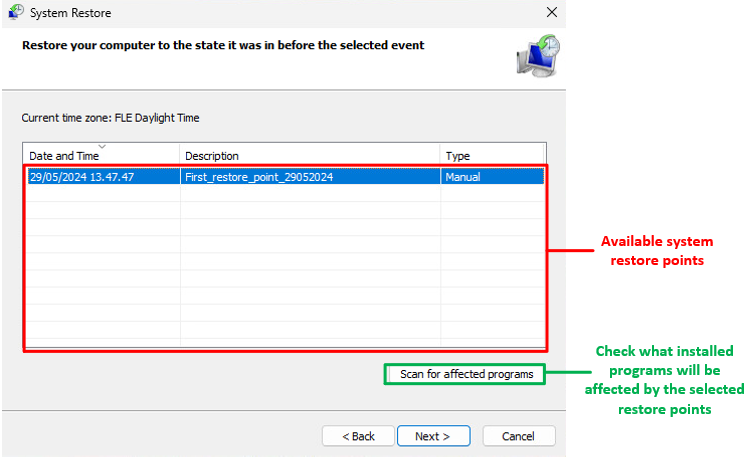
- Now that we have our first system restore point created, it can be used for restoring system to its previous state by following these steps:
- From system restore tool menu choose System restore
- From the opening menu click Next
- Choose your desired system restore point from the list
- Check Scan for affected programs if needed (highly recommended!)
- Click Next
- Click Finish
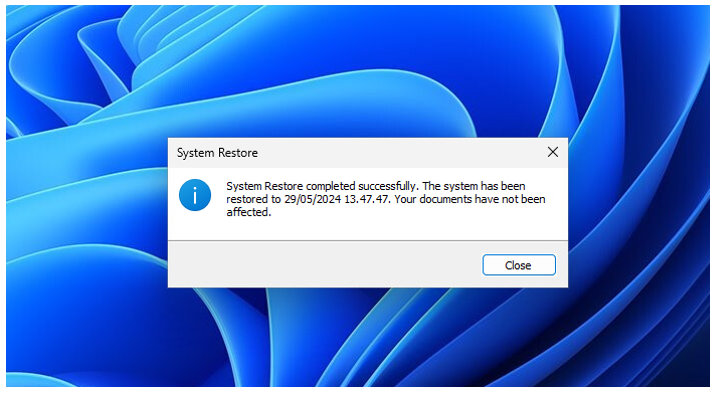
- System restore operation will start at this point and system will be restarted eventually and system will boot to the selected restore point state
Note: This will also take time and should not be interrupted!
- After the system has booted, you should see the the message popup as shown in the example image below
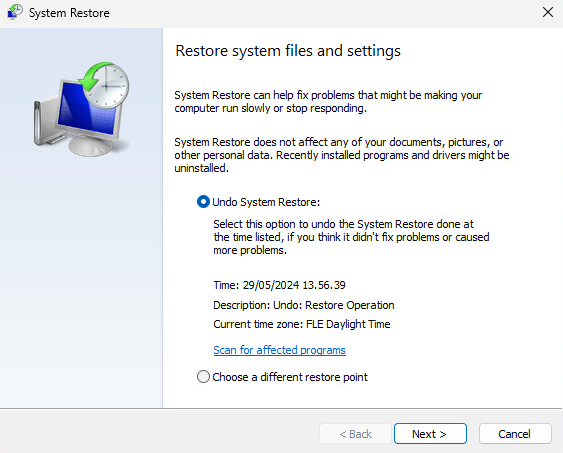
- If system restore didn't help fix the existing problem or created even more problems, change can be undone or you can try different restore point from System restore menu (see example image below)
File history
- The File History feature is a backup solution that helps users automatically save copies of their personal files
- File History allows you to back up files from libraries, desktop, contacts, and favorites to an external drive or network location
- It periodically saves versions of your files, enabling you to recover previous versions if necessary
- Once set up, File History runs in the background and automatically backs up files at regular intervals
- You can choose the frequency of these backups, ranging from every 10 minutes to once daily
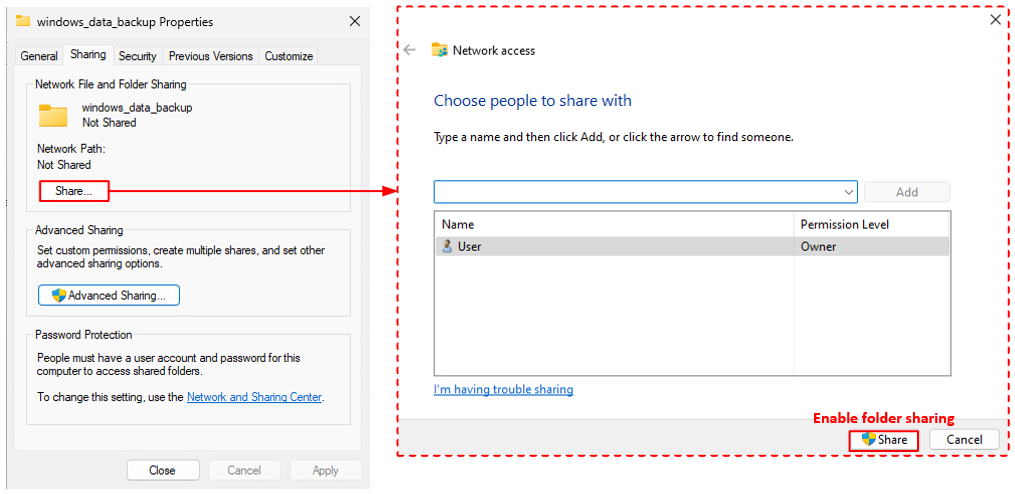
- In order to setup File History to your computer, you need to first create a folder and share it so it can be accessed from Network
- Basically this can be a folder that can be accessed locally
- Below is an example where folder called windows_data_backup is created to the root of C drive and then shared with default sharing settings
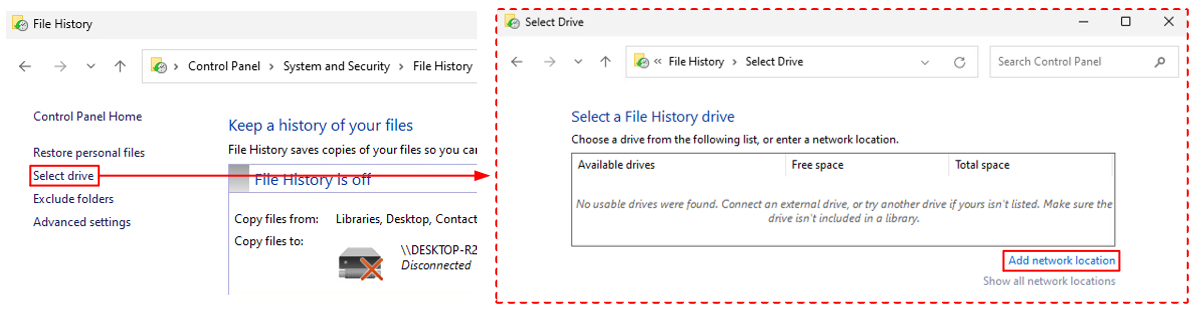
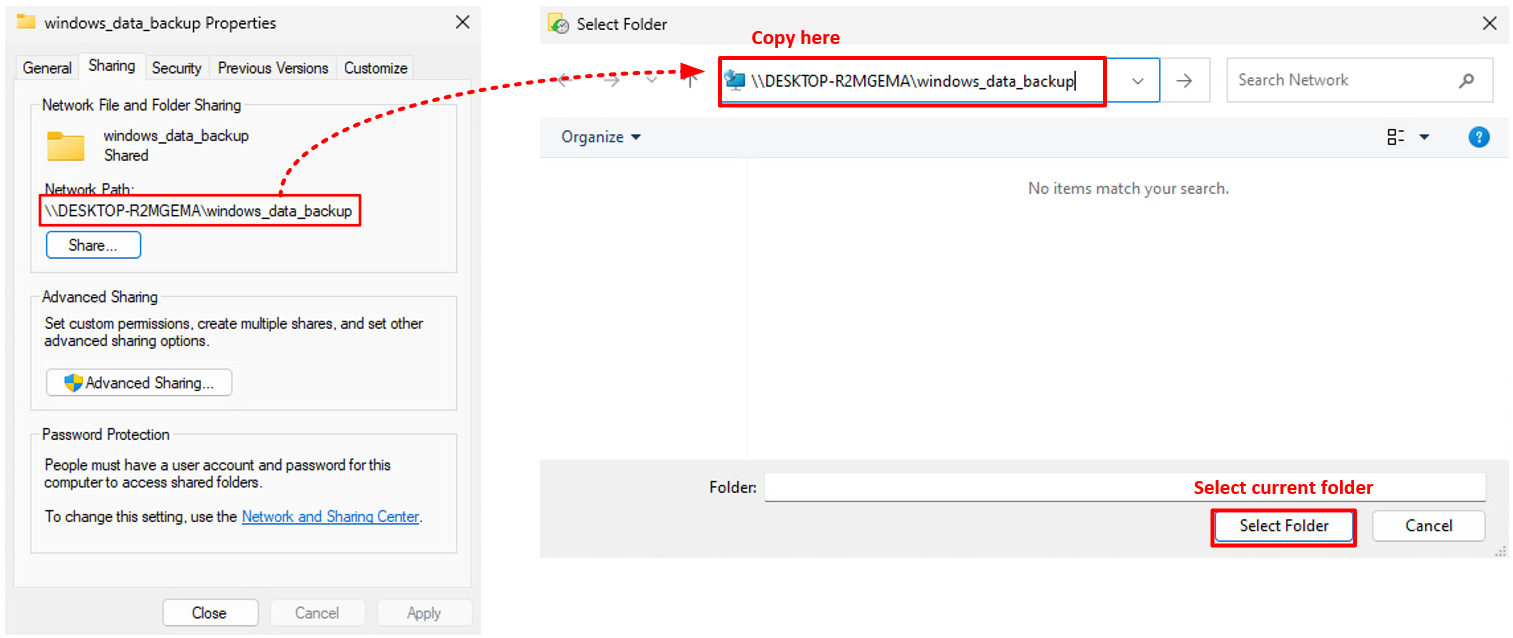
- Now that folder is shared, File History drive will be defined as presented in the example image below
- Network path of the shared folder will be used
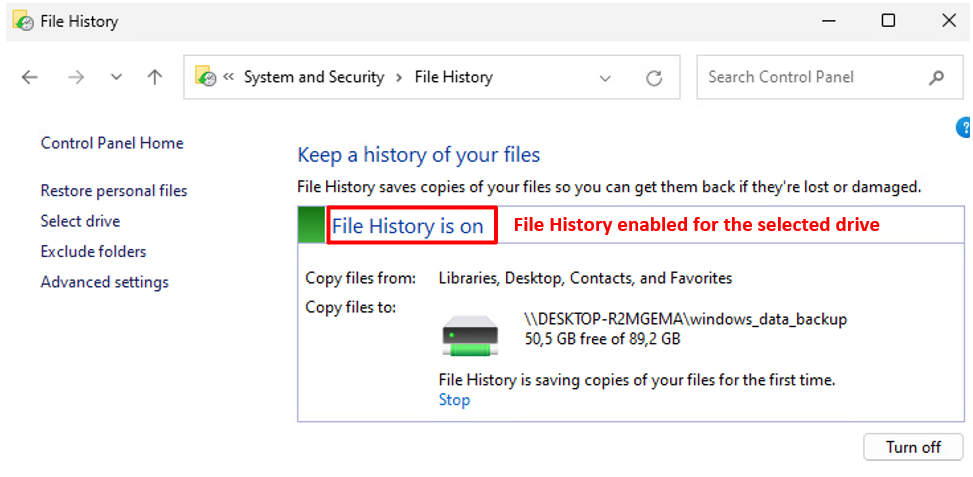
- After selecting a network drive, you should see a File History in enabled state in the previous view as shown in the example image below
- Personal user files from Library folders and others can now be restored from backup if needed
- In order to access the file listing, choose Restore personal files from the File History view