Disk management
Background
Disk Management in Windows 11 is a built-in tool that allows you to manage your computer's drives and partitions. You can use it to format drives, create and delete partitions, change drive letters, and more.
As a student learning about Windows 11 disk management in the role of an administrator, here are the key points to focus on:
Understanding Disk Management Tools
- Windows 11 provides two primary tools for managing storage devices: Disks & volumes settings and the Disk Management console.
- The Disks & volumes settings is a new experience designed to replace the legacy Disk Management console. It allows you to create new volumes, format drives, change drive letters, and manage storage.
- The Disk Management console has been around for a long time and offers tools to view and manage drives (SSDs, HDDs, USB drives). You can create, resize, format, and change drive letters and labels using this console.
Creating and Formatting Volumes - When connecting a storage device (internal or external), it usually comes pre-formatted. However, you may need to manually create and format volumes. - Use the Disks & volumes settings or the Disk Management console to create new volumes and format drives.
Drive Letters and Labels
- Assign meaningful drive letters and labels to your volumes for easier identification.
- You can change drive letters and labels using both the Disks & volumes settings and the Disk Management console.
Resizing Volumes
- Sometimes you'll want to resize volumes to create additional partitions or adjust existing ones.
- Use the Disk Management console to resize volumes.
File Systems
- Understand different file systems:
- NTFS: Default for Windows 11, supports large files, security features, and efficient data organization.
- FAT/FAT32: Older file systems with limitations (e.g., no support for files larger than 4GB).
- exFAT: Suitable for external mass storage devices.
- Choose the appropriate file system based on your needs.
Command-Line Options
- You can open Disk Management from the command line using PowerShell or Command Prompt.
- For example, type diskmgmt.msc in PowerShell or Command Prompt to launch Disk Management.
Remember to be cautious when managing partitions, especially when deleting or resizing them. Familiarize yourself with these tools, and always back up critical data before making changes! 🖥️💾
Source: Conversation with Copilot, 5/29/2024
Vocabulary
Terminology: It’s good to internalize the key terms related to disks used in the operating system.
- Physical Disk: A physical device used for storing data.
- Partition Table: Tells how the physical disk is partitioned.
- Disk Partition: A logical area within the physical device where files and directories are placed.
- Disk Volume: A disk volume is a formatted partition that has been assigned a drive letter and is ready to store data.
- Disk Allocation Unit: Data is stored on the disk in pieces or allocation units, which can be sized per partition.
- File System: A service provided by the operating system that allows programs to store data on a disk partition.
- Disk Type: Describes the way in which a disk partition can be used on a physical hard drive.
- Virtual Disk: A file located on a physical disk that can be used as if it were a physical disk for storing data.
Access Disk Management
You can access disk management tools different ways.
1) Search in Start Menu: Click the Start button and type "disk management" into the search bar. Then, select "Create and manage hard disk partitions" from the search results.
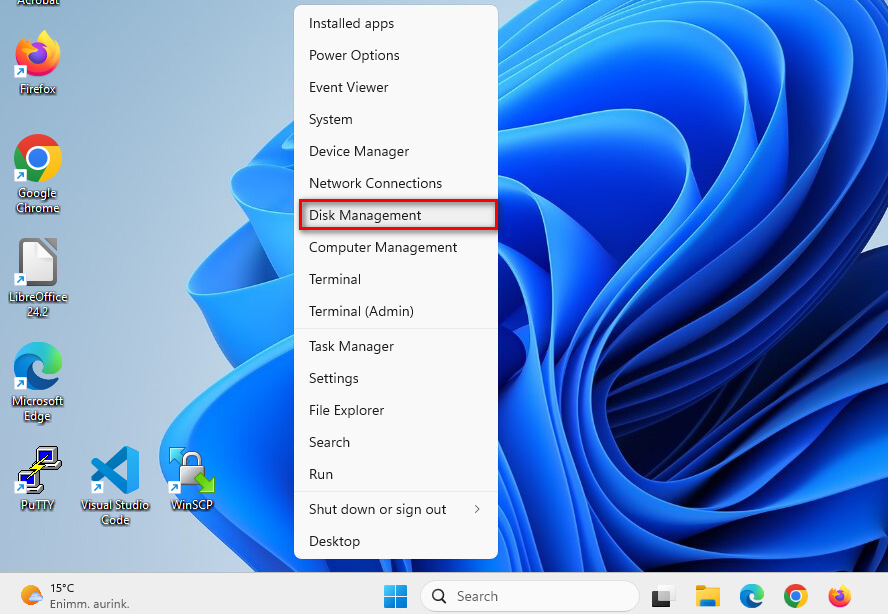
2) Power User Menu: Press Windows key + X to open the Power User Menu, then select "Disk Management" from the list.

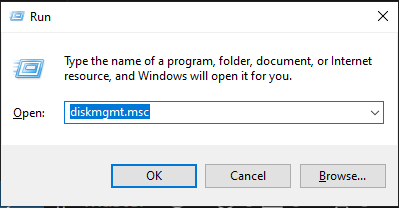
3) Run Dialog: Press Windows key + R to open the Run dialog box, type "diskmgmt.msc", and click OK.
4) Computer Management: Click the Start button, type "computer management", select the top result, then under the Storage section, click "Disk Management".
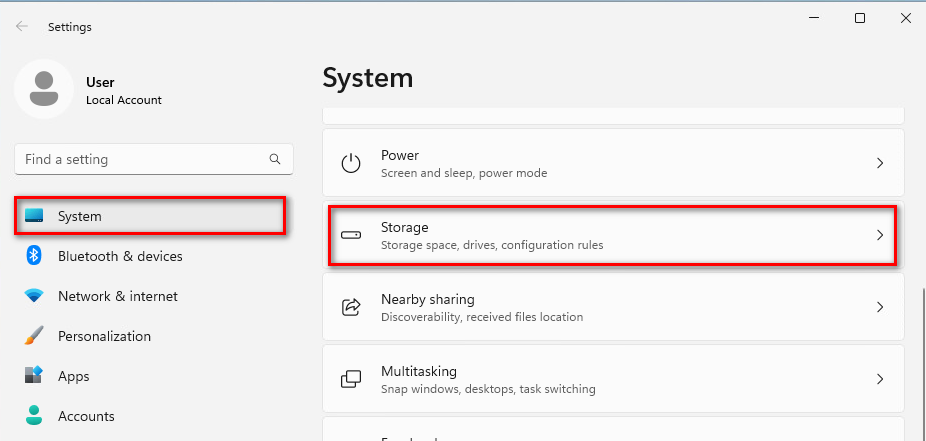
5) Settings App: Go to Settings > System > Storage, and under the "More storage settings" section, click on "Disks & volumes". This is the new experience designed to replace the Disk Management console.
Remember, when managing disks and volumes, it's important to be cautious as changes can affect the data on your drives. Always make sure to back up any important data before modifying disk partitions.
Read more How to manage storage devices on Windows 11
Disks, drives and connections
Disks
There are two types of disks in Windows:
- Basic disk
- Dynamic disk
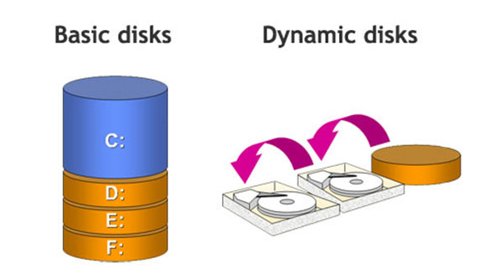
Basic disk
Basic disks are supported in all Windows operating systems since the MS-DOS era. Can contain:
- Primary partition (in finnish ensisijainen levyosio)
- Extended partition (jatko-osio)
- Logical drive (looginen asema)
It is possible to create up to four primary partitions OR three primary partitions and one extended partition.
Dynamic disk
Note !
For all usages except mirror boot volumes (using a mirror volume to host the operating system), dynamic disks are deprecated. For data that requires resiliency against drive failure, use Storage Spaces, a resilient storage virtualization solution.
Dynamic disks in Windows 11 offer advanced features for managing your storage. Unlike basic disks, which use primary and logical partitions, dynamic disks use a database to track information about volumes on the disk. It is possible to extend a volume across multiple hard drives and offer fault-tolerant volumes, which are especially utilized in servers. Here are some key points:
- Volume Types: Dynamic disks support various volume types, including simple, spanned, striped, mirrored, and RAID-5 volumes. This flexibility allows for better data management and redundancy1.
- Conversion: You can convert a basic disk to a dynamic disk using the Disk Management tool. Note that this process is irreversible without data loss unless you back up your data.
- Management: Dynamic disks are managed through the Logical Disk Manager (LDM), which keeps track of all volumes. This allows for more complex configurations and better data protection.
- Limitations: Dynamic disks are not supported on removable media or on Windows 11 Home edition. They are best used in environments where advanced storage configurations are needed.
Physical types
The physical types of computer drives and their connection methods are important parts of data processing. These drive types and connection methods affect the performance and storage capacity of computers. It's important to choose the right type according to the intended use.
There are two physical types of drives:
HDD (Hard Disk Drive)
- HDDs are still common and available in both internal and external models.
- They are disk packs enclosed in a sealed casing, where data is stored and read using a read/write head.
- HDDs are popular due to their large storage capacity and favorable cost-performance ratio.
SSD (Solid State Drive)
- SSDs store data on flash memory chips.
- They have no mechanical moving parts, instead relying on semiconductor circuits.
- SSDs have advantages over HDDs, such as lower power consumption, faster access time, and silence.
- They are particularly well-suited as operating system drives and for installed programs due to their fast access time.
Solid State Drives (SSDs) offer several advantages over traditional Hard Disk Drives (HDDs):
- Speed: SSDs are significantly faster than HDDs. They can boot up your computer, load applications, and transfer files much quicker.
- Durability: SSDs have no moving parts, making them more resistant to physical shock and less likely to fail compared to HDDs, which have spinning disks.
- Energy Efficiency: SSDs consume less power, which can lead to longer battery life in laptops and lower energy costs for desktops.
- Noise: Since SSDs don't have moving parts, they operate silently, unlike the often noisy HDDs.
- Size and Weight: SSDs are generally smaller and lighter than HDDs, making them ideal for portable devices.
Connection Methods
Connection Methods are following:
M.2 (SATA or NVMe)
- M.2 SATA SSDs use the same communication protocol as a traditional 2.5-inch SATA SSD. They are generally the slowest of the M.2 types, but are a reliable and cost-effective upgrade from a mechanical hard drive.
- M.2 NVMe SSDs use the PCIe bus and the modern NVMe protocol, allowing them to communicate directly with the CPU. This enables much faster data transfer speeds, making them ideal for high-performance tasks, gaming, and content creation.
The physical notch(es) on the drive's connector, called keys, are another important factor for compatibility:
- M Key: Has a notch on the right side (looking at the pins). This key supports PCIe x4 (the fastest NVMe drives) and SATA. It is used on most high-performance NVMe SSDs.
- B Key: Has a notch on the left side. This key supports SATA and PCIe x2 (slower). It is less common for modern SSDs.
- B+M Key: Has two notches (one on each side). This design maximizes compatibility, as the drive can fit in either an M-keyed or B-keyed socket, but it is electrically limited to the slower SATA or PCIe x2 speeds. M.2 SATA SSDs commonly use B+M keying
SATA (Serial ATA)
- Serial data transfer.
- SATA is significantly faster than the previous parallel data transfer method.
IDE/ATA (Integrated Drive Electronics/Advanced Technology Attachment)
- Parallel data transfer.
- IDE/ATA is gradually being phased out in favor of SATA connections.
SCSI (Small Computer System Interface)
- Typically used in servers.
Windows Supported File Systems
Windows supports several file systems, each with its own features and use cases. The file systems help organize and manage data efficiently on different types of storage devices. Te supported file systems are:
NTFS (New Technology File System)
- Default file system for modern Windows.
- Developed by Microsoft in 1993.
- Overcomes FAT limitations.
- Supports large files, security features, and efficient data organization.
FAT32 (File Allocation Table 32)
- Widely compatible with various operating systems.
- Includes versions like FAT16 and FAT32.
- Limitations: Doesn't support files larger than 4GB and storage capacities over 32GB without a third party software.
- Commonly used for low-capacity flash drives.
exFAT (Extended File Allocation Table)
- Designed for external mass storage devices.
- Suitable for larger partition sizes and storing bigger files than FAT32.
- Used when FAT32 limitations are restrictive.
ReFS (Resilient File System)
- Used primarily in servers, not commonly used for regular desktop systems.
- Supported in Windows Server operating systems (from Windows Server 2012).
- Support large volumes and auto-correct data corruption.
- Focuses on data integrity, scalability, and fault tolerance.
Choose the appropriate file system based on your storage needs and compatibility. There are some differences between Windows file systems.
NTFS (New Technology File System)
- Capable of automatically repairing some errors on the disk.
- Supports larger hard drives.
- Improved security as it allows setting permissions for users and user groups.
- Supports "journaling," meaning it keeps a record of all changes made in the system, and changes remain valid even after power outages.
FAT/FAT32 (File Allocation Table)
- Used in the past as the file system for the operating system disk in MSDOS-based Windows (during the Windows 95/98/ME era).
- Weak security, as any user of the computer can read any file from the disk.
- Size limitations: does not support partitions over 32GB or files larger than 4GB.
- Does not support journaling.
exFAT (Extended File Allocation Table)
- Mainly targeted at external mass storage devices for which the NTFS file system would be too heavy.
- Supports simple permissions and removes the drive and file size limitations of FAT32.
Create a new partition
To create a new partition in Windows 11, you have a few options.
- Using the Settings App:
- Open Settings on Windows 11.
- Click on Storage.
- Under the "Storage Management" section, click on Advanced storage settings.
- Click the Disks & volumes setting.
- Select the SSD or HDD storage where you want to create a new partition.
-
Choose the unallocated space and click the Create volume button. Follow the wizard to assign a label, drive letter, file system, and size for the new partition. Finally, click Format⁴.
-
Using Disk Management:
- Right-click the Start menu and select Disk Management.
- Right-click the unallocated space and choose New Simple Volume.
-
Follow the wizard to assign a drive letter, format the volume, and label it⁵.
-
During Windows 11 Installation:
- If you're installing Windows 11, you can create partitions during the setup process.
- When you reach the partition selection screen, choose the unallocated space and create a new partition⁶.
Remember to back up any important data before making changes to your partitions. Creating a new partition can affect existing data, so proceed with caution! 😊
Read more: Create and format a hard disk partition - Microsoft Support. https://support.microsoft.com/en-us/windows/
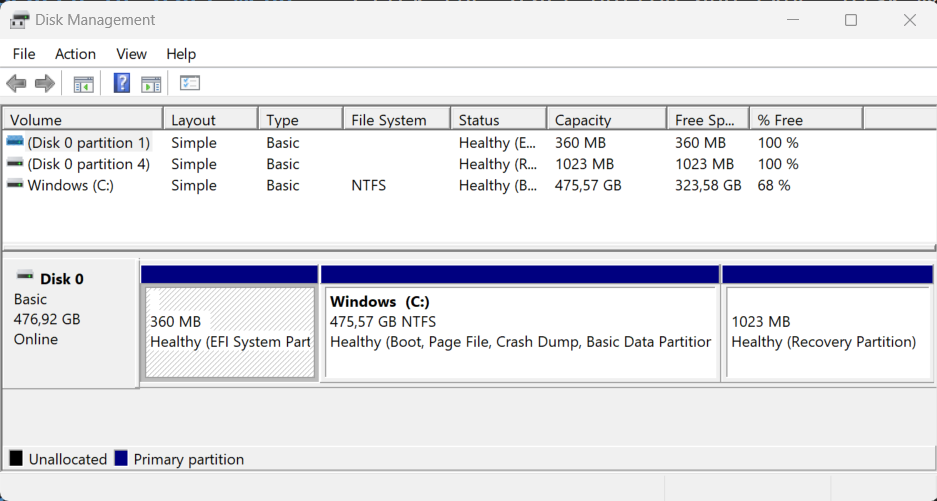
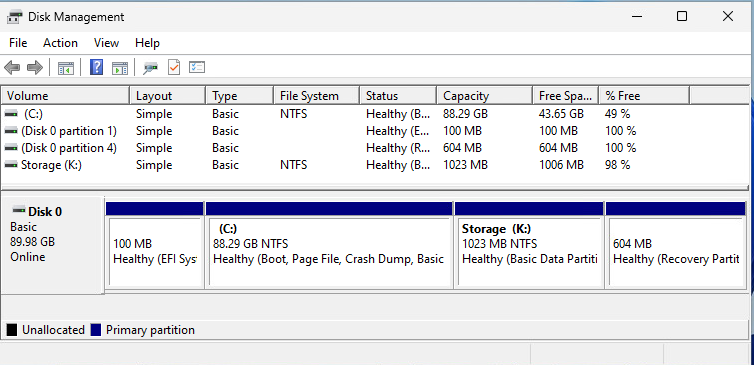
Properties of disk partition
You can check properties of a disk by selecting a disk and with the rigth button of the mouse.
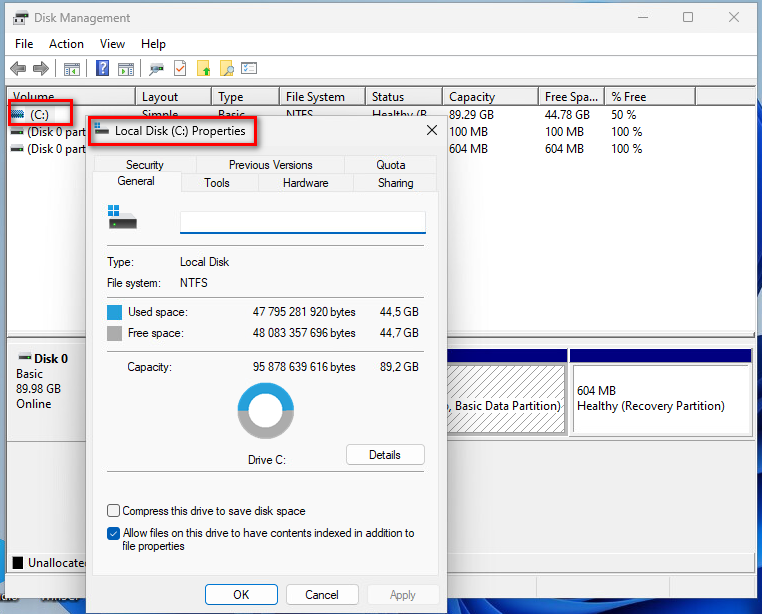
Details of the local disk will show storage usage of the disk.
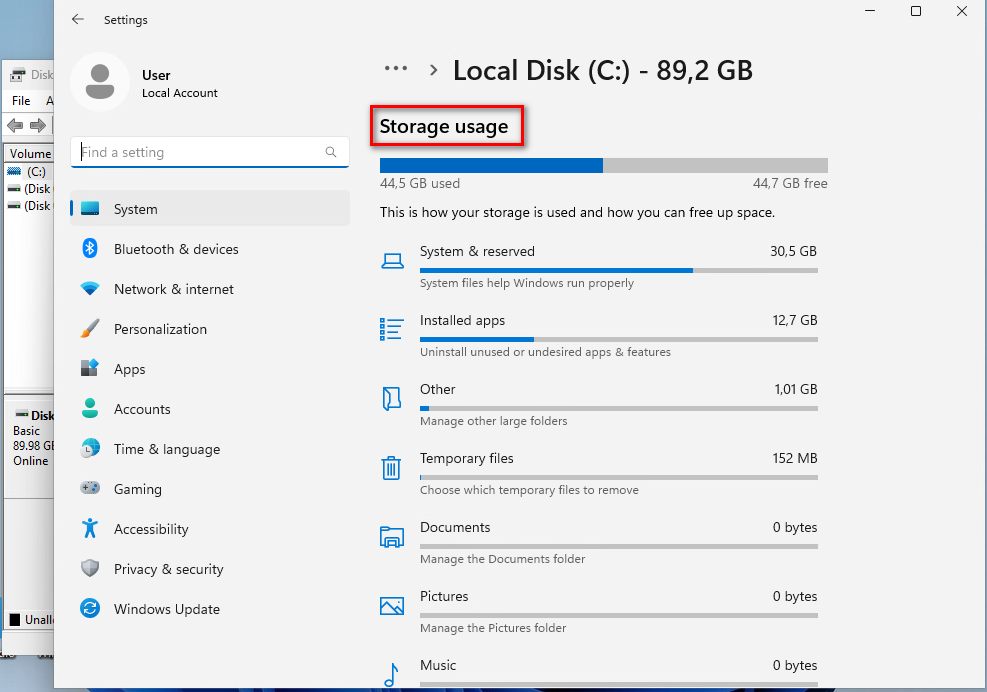
Disk Volume
In Windows 11, a disk volume is a storage area on a physical disk that has been formatted with a file system and assigned a drive letter. Volumes are used to organize and manage data on your computer.
Here are some key points about disk volumes:
- Types of Volumes: There are different types of volumes, such as primary partitions, extended partitions, and logical drives.
- File System: Each volume is formatted with a file system, such as NTFS, FAT32, or exFAT, which determines how data is stored and retrieved.
- Drive Letters: Volumes are assigned drive letters (e.g., C:, D:) to make them accessible through File Explorer.
- Disk Management: You can manage volumes using the Disk Management tool in Windows 11. This includes creating, deleting, resizing, and formatting volumes
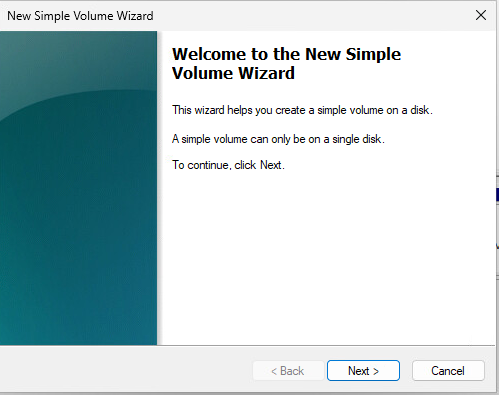
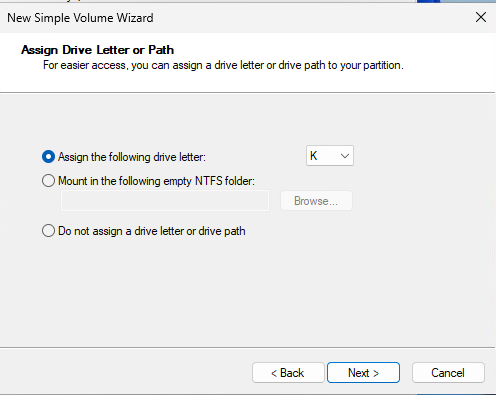
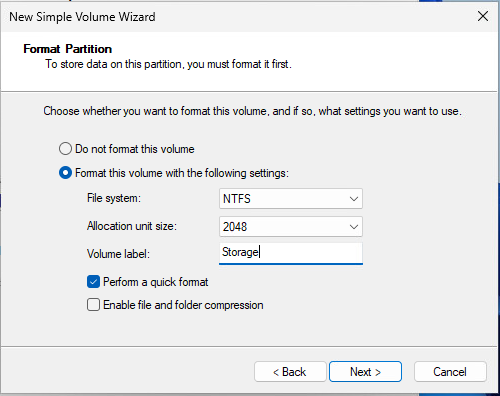
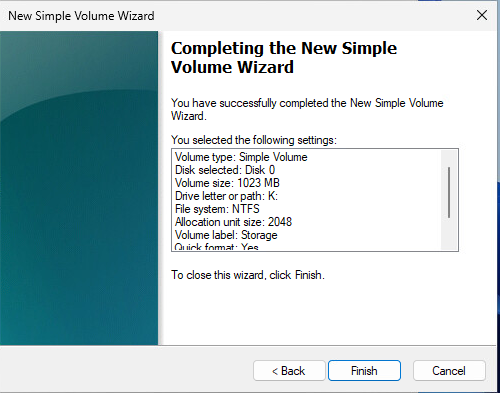
Create New Volume
In the following pictures is shown how to create a new volume with Simple Volume Wizard.

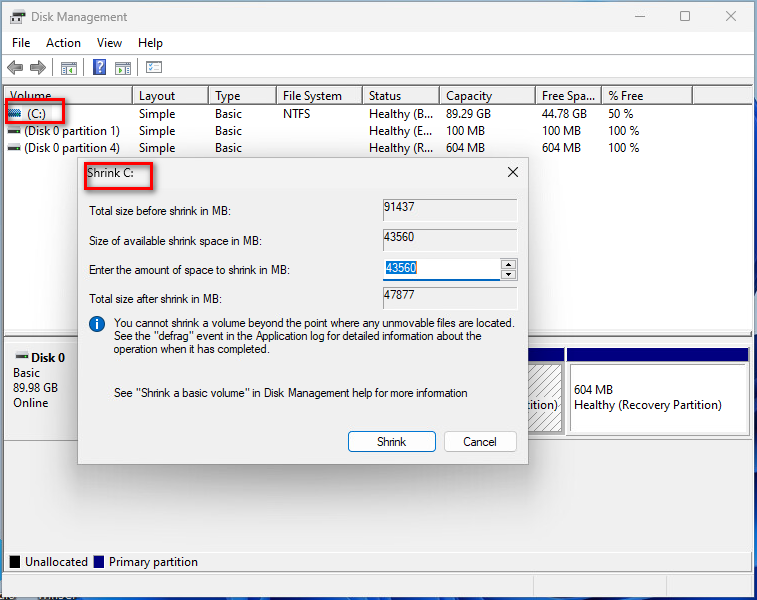
Shrinking the volume
Shrinking the volume in Windows 11 refers to the process of reducing the size of an existing partition on your hard drive. This is done using the Disk Management tool, which allows you to free up unallocated space that can be used for other purposes, such as creating a new partition or extending another existing partition.
Here are the steps to shrink a volume in Windows 11:
1. Open Disk Management: Press Windows + X and select “Disk Management” from the menu.
2. Select the Volume to Shrink: Right-click on the volume you want to shrink and choose “Shrink Volume.”
3. Enter the Amount to Shrink: In the dialog box that appears, enter the amount of space you want to shrink in megabytes (MB) and click “Shrink.”
4. Wait for the Process to Complete: The system will process your request and shrink the volume.
5. Verify the New Partition Size: Check the Disk Management tool to confirm the new size of the partition and the amount of unallocated space
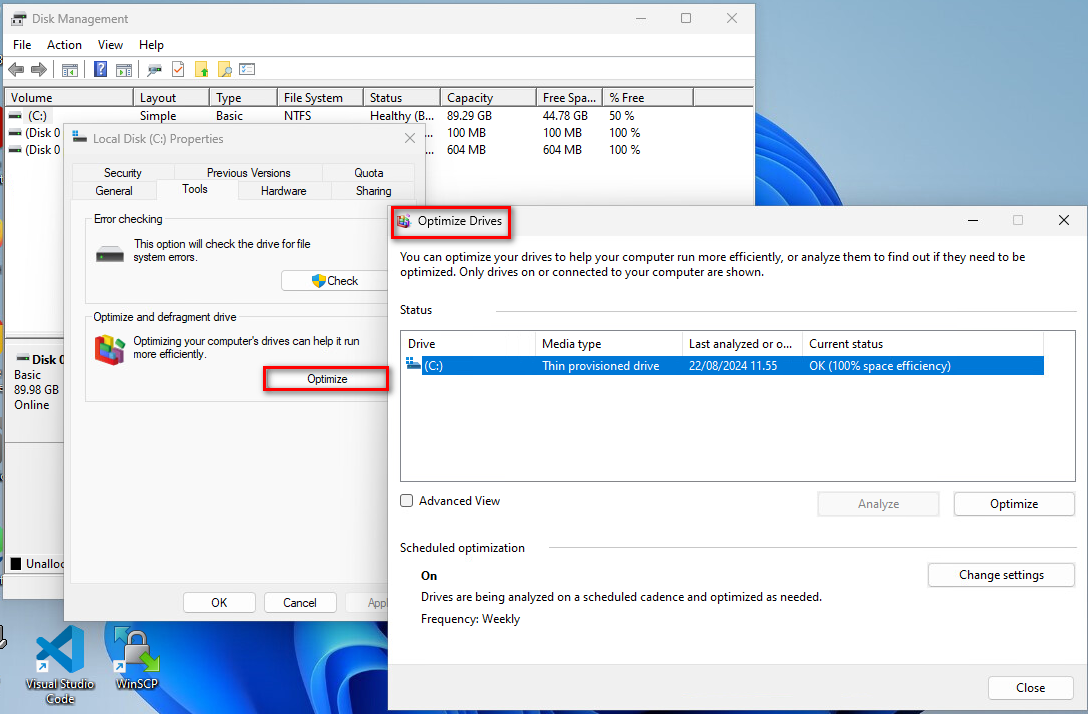
Optimize drive
A drive can be optimized to help a computer run more efficiently, or to find out if there are nedd to be optimized. The optimization can be scheduled to run automatically freqently.
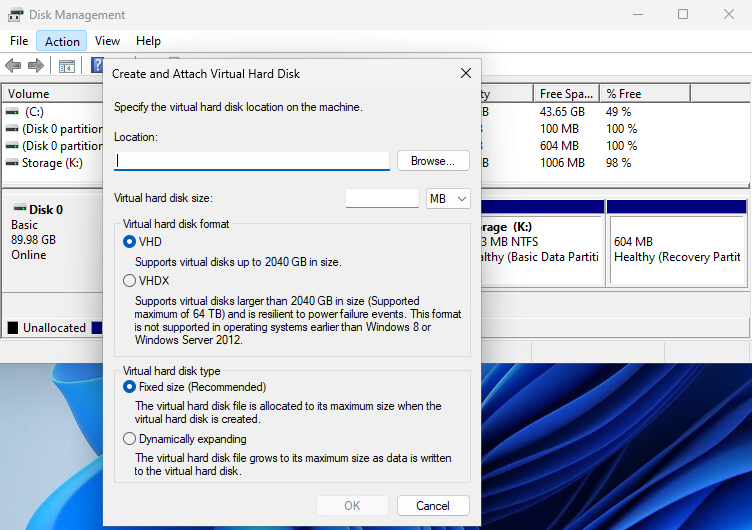
Virtual Hard Drive
Virtual Hard Disk (VHD) is a file format that functions like a physical hard disk. In Windows 11, VHD is often used with virtual machines, but it can also be used for other storage purposes. A VHD file can contain files, folders, and even entire operating systems.
Create New VHD
In the following picture is shown how to start creating and attaching a new VHD.
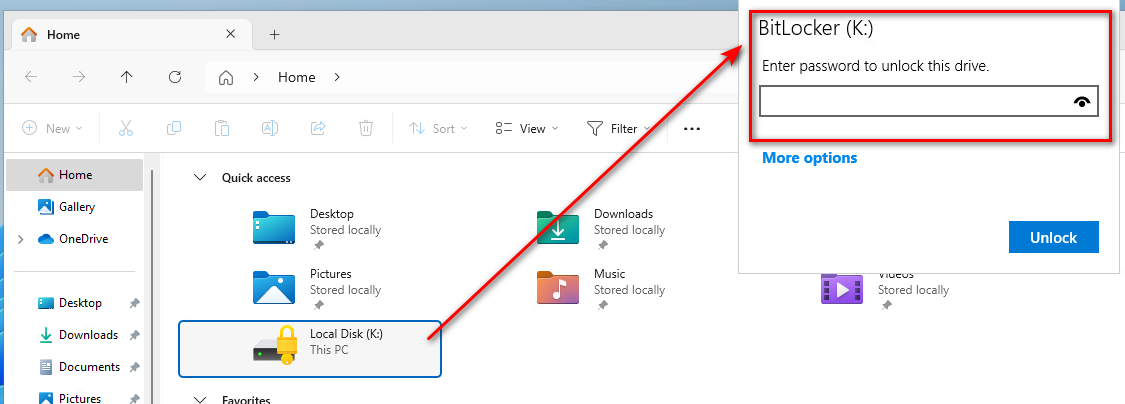
BitLocker
BitLocker is a built-in encryption feature in Windows 11 that helps protect your data by encrypting your drives. It ensures that your data is secure and inaccessible to unauthorized users by requiring a decryption key or password to access the encrypted data.
BitLocker is available on Windows 11 Pro, Enterprise, and Education editions.
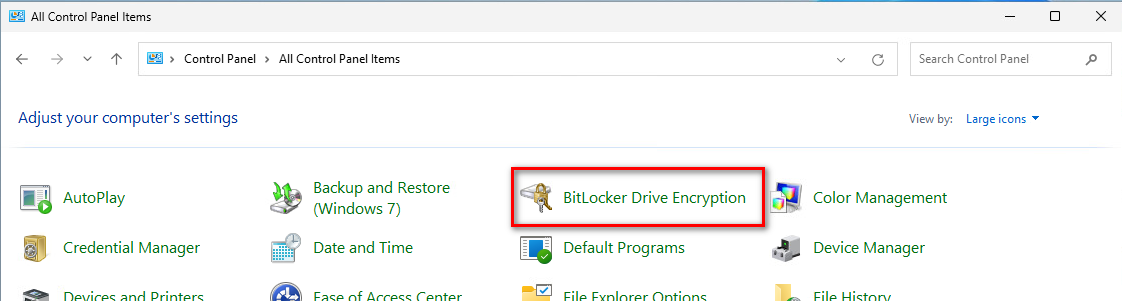
Check is BitLocker enabled.
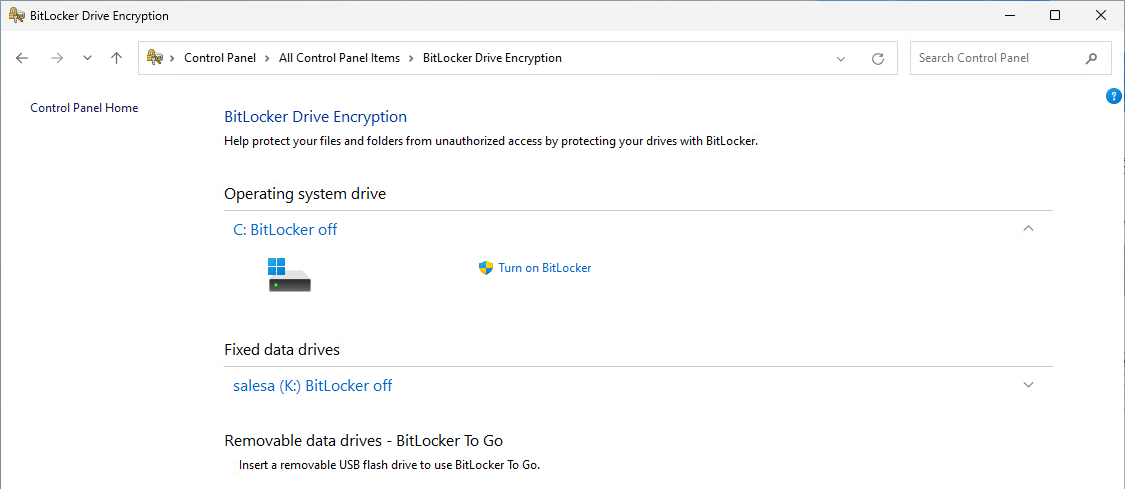
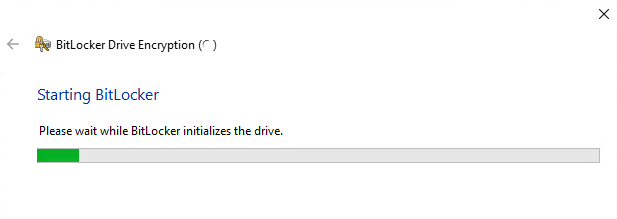
Checking that drive is ready and available for Bitlocker.
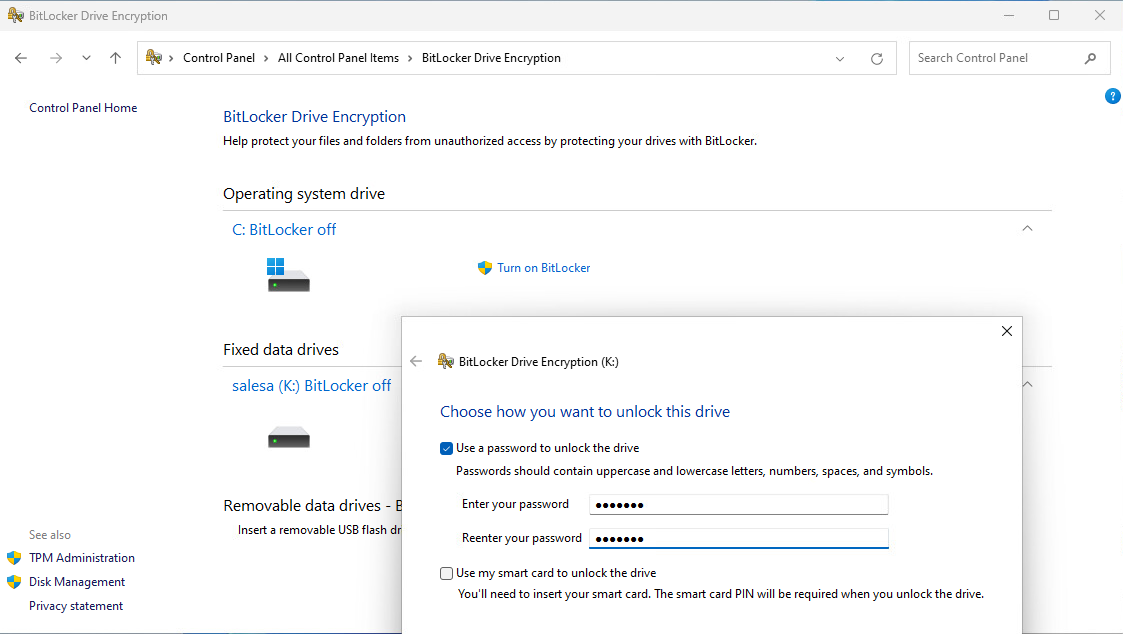
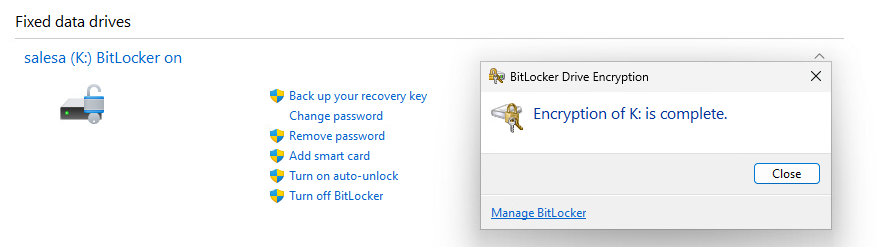
Here is K: drive including sensitive business data secured with BitLocker. The password is required to open K: drive:
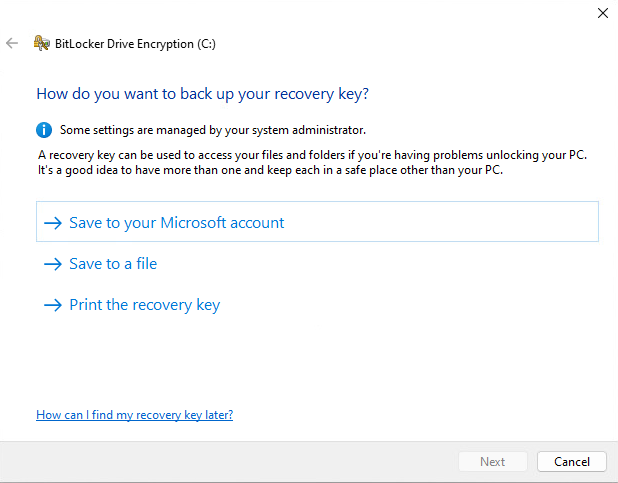
Create a recovery key or file for Bitlocker. DO NOT FORGET your password, and DO NOT LOOSE your recovery key!
A recovery key can be used to access your files and folders if you have problems unlocking your PC,
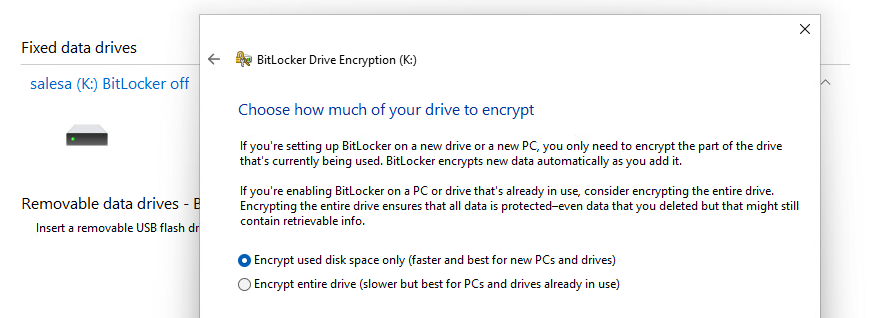
Choose how much of your drive will be encrypted, partly or entire depending is the drive currently used.
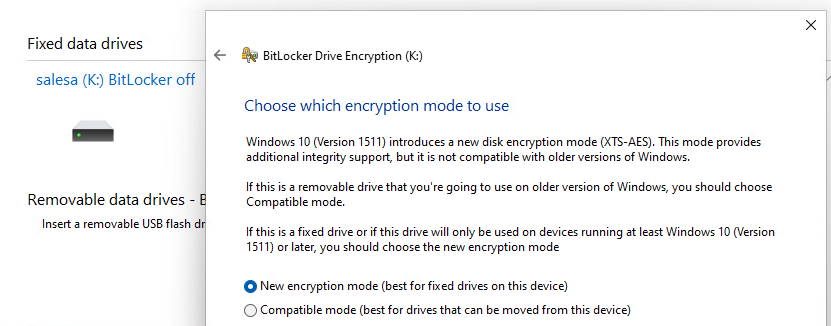
Choose an encyption mode.
Are you ready? Here we GO!
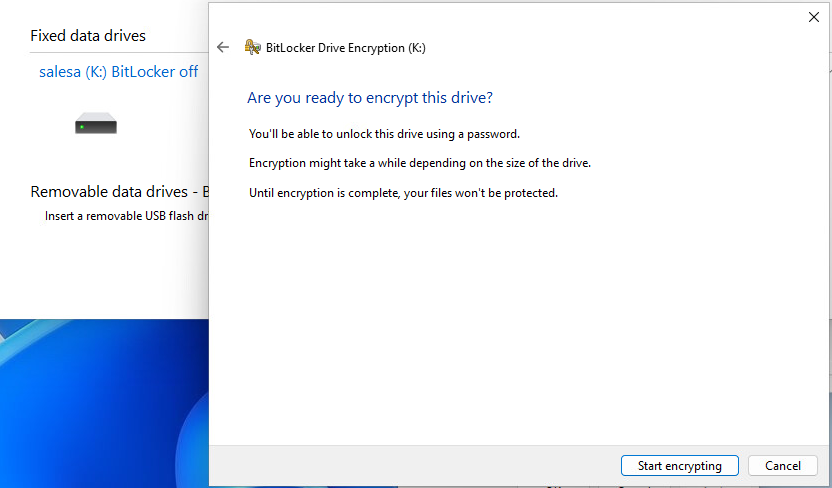
Drive is now encypted with BitLocker. Your sensitive private data will be in safe if you loose computer.
After restart BitLocker works, and you have to give the password for accessing drive.